Wednesday, November 5, 2008
This is Why I Love Microsoft's OS
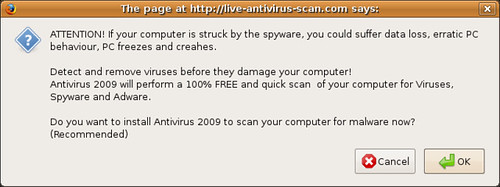
I don't like it when my PC creahes.
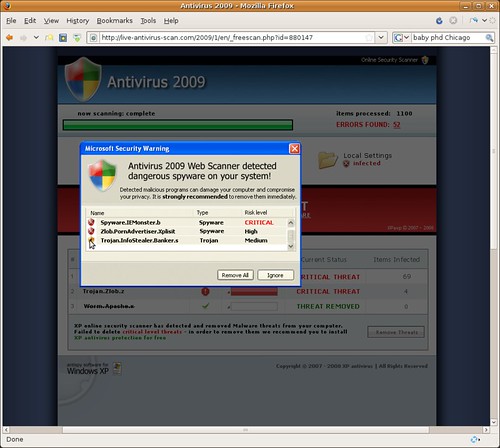
The file has been digitally signed and independently certified as 100% free of spyware, adware and viruses.
After scanning my C:/ drive and my Window files, it reported that I had an IEMonster, Porn Advertiser & Trojan Banker InfoStealer.
I didn't even know I had a C:/ drive or that Microsoft issued Security Warnings to Linux Users.
I feel sorry for people who hit install.
Trust me, that Microsoft certification course you took at the community college/high school only certifies that you can attend a class.
edited by pHreaksYcle
Monday, November 3, 2008
Go Vote, Pretty Please
This morning I received a email from nin.com that sums up what I wanted to write today.
This Tuesday, we will elect the next President of the United States. The result will have great consequences for the nation.
This election offers a choice between two men with dramatically different visions of the future. We have strong feelings about this choice. But we feel even more strongly that all Americans, regardless of political preference, have a stake in the outcome and should vote in this critical election.
This is likely to be a close election. Your vote matters. Please use it and make a difference.
-----
So dust off your Cheeto stained hands, stop watching internet porn and go vote. I know the sun is a harsh beast, but sacrifices must be made.
edited by pHreaksYcle
Labels:
go vote
Sunday, November 2, 2008
Ubuntu 8.10 Intrepid Ibex Starter Guide
If you decided to run Ubuntu 8.10 Intrepid Ibex on your Dell Inspiron 1501 you came to the right place. This blog is a great starter guide for getting things to work.
Every piece of hardware on the Dell 1501 works in Ubuntu, wireless requires setup but it is much less work then a fresh install of Windows XP/Vista. It's not as hard as it looks and everything here is tested and confirmed to work.
Overview of Ubuntu 8.10 on the Dell Inspiron 1501
Using NDISwrapper for wireless
NDISwrapper uses a wireless devices' Windows driver in Linux.
Installing restricted media codecs
This guide will allowing you to play Flash, Java mp3, aac, DVDs ,mp4, avi, wmv and many more formats. It also installs the Microsoft true type fonts for better compatibility with Word documents.
Installing the Medibuntu repository
Medibuntu is a repository of packages that cannot be included into the Ubuntu distribution for legal reasons like copyright, license or patent restrictions. It also includes many popular .debs for ffmpeg encoding, w32codes, skype and google earth.
Installing Wine
Wine is a compatibility layer for running Windows applications on Linux.
Mandx that's the point, everyone should check out our new Blog about running Ubuntu on the Dell Inspiron Mini 9
Labels:
Intrepid Ibex,
new user guide,
overview,
ubuntu1501
NDISwrapper in Ubuntu 8.10 Intrepid Ibex
NDISwrapper uses a wireless devices' Windows driver in Linux. If you are using the Broadcom STA wireless driver via the Driver Manager and it's working for all your day to day needs, I wouldn't recommend taking the time to change drivers. NDISwrapper used to work better then the Broadcom driver but in Intrepid Ibex, I haven't noticed a substantial difference.
If you have already enabled the Broadcom restricted driver, uninstall it before attempting this guide.
Step 1: Stop ssb From Loading Before NDISwrapper
Make a script for NDISwrapper's fix
In a terminal type:
sudo gedit /etc/init.d/wirelessfix.sh
Paste this into the file:
#!/bin/bash
modprobe -r b44
modprobe -r b43
modprobe -r ssb
modprobe -r ndiswrapper
modprobe ndiswrapper
modprobe b44
Point the terminal to your init.d file and make your script exectuable:
In a terminal type:
cd /etc/init.d/ && sudo chmod 755 wirelessfix.sh
Update and make it stick:
In a terminal type:
sudo update-rc.d wirelessfix.sh defaults
Then reboot
In a terminal type:
sudo reboot
Step 2: Get Needed Packages
To install ndiswrapper
In a terminal type:
sudo apt-get install ndiswrapper-utils-1.9 ndiswrapper-common
or you can also try:
sudo apt-get install ndiswrapper-utils-1.9* ndiswrapper-common
***If the terminal outputs an error message, telling you NDISwrapper could not be found, insert the Ubuntu disc you used to install Intrepid Ibex and manually search for the file.
Get the Windows driver for your Dell 1501.
This is for the Broadcom 1395 chipset. if yours is different you will need to find the correct windows driver for your chipset to make this guide work.
In a terminal type:
wget http://ftp.us.dell.com/network/R140747.EXE
Step 3: Get Everything Ready
Now we will make a folder.
In a terminal type:
mkdir ~/.drivers
Now we will move R140747.EXE (the Dell driver), to the folder we just made.
In a terminal type:
mv ~/R140747.EXE ~/.drivers
STEP 4: Driver Setup
In order for us to unzip the R140747.EXE driver we need to point your terminal to the /.driver folder.
In a terminal type:
cd ~/.drivers
Unzip the R140747.EXE driver
In a terminal type:
unzip -a R140747.EXE
We need to point your terminal to the DRIVER folder we just unzipped
In a terminal type:
cd ~/.drivers/DRIVER
Step 5: Configure The Windows driver With NDISwrapper
Now install the Windows driver
In a terminal type:
sudo ndiswrapper -i bcmwl5.inf
* bcmwl5.inf is for my chipset, if you are using another driver you will have to use a different .inf file.
Then:
sudo ndiswrapper -l (that is a lowercase L)
You should see a message that says driver present, hardware detected.
Now finish installing the driver
In a terminal type:
sudo ndiswrapper -m
Then:
sudo modprobe ndiswrapper
YOU MUST REBOOT NOW!
In a terminal type:
sudo reboot
STEP 6: TEST WIRELESS
Your wifi light on your laptop should be illuminated. If not, you can always turn it on and off with the Fn+F2 (Function & F2 Key) and you're all set! Try running this to see if your wireless card is functioning properly.)
In a terminal type:
sudo iwlist scanning
edited by pHreaksYcle
Labels:
guide,
howto,
Intrepid Ibex,
ndiswrapper,
ubuntu1501,
wireless
Wednesday, October 22, 2008
Ubuntu 8.10 Intrepid Ibex on the Dell Inspiron 1501
Installation:
Intrepid installs without a problem.
Wireless:
Two Methods:
1. The Broadcom STA proprietary wireless driver can be installed via Intrepid's Hardware Drivers gui with two mouse clicks. I found the driver to be a vast improvement over Hardy's,
2. Using NDISWrapper.
ATI Open Source Driver
It took years of of praying, hoping and waiting but Dell 1501/ATI x1150 users finally have a working open source driver. It is installed by default in Ubuntu 8.10.
Compiz-Fusion
Compiz-Fusion runs and pretty well.
To get the most out of Compiz try installing the settings manager and launcher.
In a terminal:
Media Codecs
Intrepid Ibex makes codec installation easy. Mp3, DVD, avi, aac, mpeg, wmv, asf, mov, flv, mp4, flash codecs are installed when you try to play them. If you like to add all the major codecs and make playback easy, check out this guide. The only thing not enabled in Ubuntu is reading encrypted DVDs. To add DVD playback and some other helpful media codecs to Ubuntu follow this guide.
Ethernet
Works out of the box. In order to do any of these guides you're going to need to plug in your Dell Inspiron 1501. Don't be cheap, go out and buy an Ethernet cable.
Brightness & Volume
Brightness (Fn Up/Down Arrow) and Volume (Fn Page Up/Page Dn) keyboard shortcuts both work.
Suspend & Hibernate
Both Suspend and Hibernate.
Video Out
Works out of the box, Intrepid's Screens and Resolutions (System>Administration>Screens and Resolutions) makes using an external multiple monitor a breeze. Configuration for dual monitors does require editing your xorg.conf file.
Modem
The Conexant Modem driver is usually released by Dell once they switch their Linux machines over to the new version of Ubuntu. Right now there is no deb for the modem driver. I'll update the site and this space when Dell releases it.
Card Reader
Works out of the box.
edited by pHreaksYcle
Intrepid installs without a problem.
Wireless:
Two Methods:
1. The Broadcom STA proprietary wireless driver can be installed via Intrepid's Hardware Drivers gui with two mouse clicks. I found the driver to be a vast improvement over Hardy's,
2. Using NDISWrapper.
ATI Open Source Driver
It took years of of praying, hoping and waiting but Dell 1501/ATI x1150 users finally have a working open source driver. It is installed by default in Ubuntu 8.10.
Compiz-Fusion
Compiz-Fusion runs and pretty well.
To get the most out of Compiz try installing the settings manager and launcher.
In a terminal:
sudo apt-get install compizconfig-settings-manager
sudo apt-get install fusion-icon
Media Codecs
Intrepid Ibex makes codec installation easy. Mp3, DVD, avi, aac, mpeg, wmv, asf, mov, flv, mp4, flash codecs are installed when you try to play them. If you like to add all the major codecs and make playback easy, check out this guide. The only thing not enabled in Ubuntu is reading encrypted DVDs. To add DVD playback and some other helpful media codecs to Ubuntu follow this guide.
Ethernet
Works out of the box. In order to do any of these guides you're going to need to plug in your Dell Inspiron 1501. Don't be cheap, go out and buy an Ethernet cable.
Brightness & Volume
Brightness (Fn Up/Down Arrow) and Volume (Fn Page Up/Page Dn) keyboard shortcuts both work.
Suspend & Hibernate
Both Suspend and Hibernate.
Video Out
Works out of the box, Intrepid's Screens and Resolutions (System>Administration>Screens and Resolutions) makes using an external multiple monitor a breeze. Configuration for dual monitors does require editing your xorg.conf file.
Modem
The Conexant Modem driver is usually released by Dell once they switch their Linux machines over to the new version of Ubuntu. Right now there is no deb for the modem driver. I'll update the site and this space when Dell releases it.
Card Reader
Works out of the box.
edited by pHreaksYcle
Labels:
ATI driver,
compiz fusion,
Intrepid Ibex,
media codecs,
Medibuntu,
overview,
ubuntu1501,
wireless
Thursday, October 16, 2008
My Dell Inspiron Mini 9 Blog
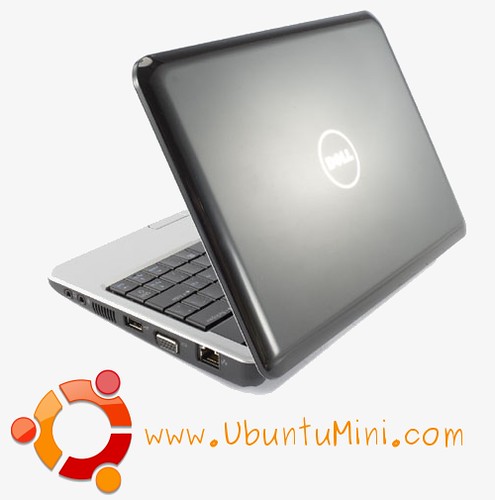
I received my Dell Inspiron Mini 9 yesterday and pHreaksYcle should be getting his today. I love it already. We started a new Ubuntu blog for it about a month ago. Check it out, we're working really hard on it.
The Dell Inspiron 1501 will always have a special place in my heart, I cut my mobile Linux teeth on it. www.ubuntu1501.com isn't going anywhere, but I will be needing your help to keep it going.
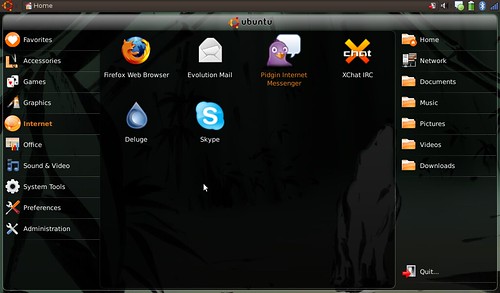
Here's a sneak peak at what I've been up to on the Dell Mini 9:
The Dell Inspiron 1501 will always have a special place in my heart, I cut my mobile Linux teeth on it. www.ubuntu1501.com isn't going anywhere, but I will be needing your help to keep it going.
Here's a sneak peak at what I've been up to on the Dell Mini 9:
Labels:
dell mini 9,
new blog
Friday, October 3, 2008
Favorite FireFox 3 Plugins
These are the Firefox 3 plugins I cannot live without:
Foxmarks Bookmark Synchronizer
If you use Firefox on more than one computer, you'll want Foxmarks. Install Foxmarks on each computer, and it will work silently in the background to keep your bookmarks synchronized. You can also log in to my.foxmarks.com to manage your bookmarks from any computer.
Custom Download Manager
This addon allows you to personalize your download manager. Now, you can open the download manager on a new tab or on the sidebar.
Open Tabs Relative
Tabs Open Relative makes all new tabs open to the right of the current tab, rather than at the far right of the tab bar.
Open Image In New Tab
Adds right-click context menu item for opening images in new tabs.
Undo Closed Tab Button
Tired of going to History -> Recently Closed Tabs just to undo a closed tab? Then this extension is for you! This extension allows you to undo closed tabs via a toolbar and/or tab bar button or the right-click context menu.
Adblock Plus
Ever been annoyed by all those ads and banners on the internet that often take longer to download than everything else on the page? Install Adblock Plus now and get rid of them.
Adblock Plus: Element Hiding Helper
Fight the text ads! Element Hiding Helper is a companion extension for Adblock Plus meant to make creating element hiding rules easier.
Flashblock
Flashblock is an extension for the Mozilla, Firefox, and Netscape browsers that takes a pessimistic approach to dealing with Macromedia Flash content on a webpage and blocks ALL Flash content from loading. It then leaves placeholders on the webpage that allow you to click to download and then view the Flash content.
Mouse Gestures Redox
Allows you to execute common commands (like page forward/backward, close tab, new tab) by mouse gestures drawn over the current webpage, without reaching for the toolbar or the keyboard.
I'd love to know what plugins you use, leave a comment with a description.
Sunday, September 28, 2008
Human Theme for Thunderbird by Mares
Mares sent sent us a link about his/her human theme for Thunderbird. While I have been using Evolution, I think I might be switching back to Thunderbird thanks to Mares.
To Install Thunderbird:
In a terminal type:
sudo apt-get install thunderbird
To checkout or download Mares theme, which look amazing, check out the official download link at Mozilla's site.
And as always you can contact me at redDEADresolve on Google mail. Hopefully Mares will send us a nice screen shot to go with the article.
Labels:
install,
mozilla,
theme,
thunderbird
Wednesday, September 3, 2008
Whats Planned For Ubuntu 8.10 Intrepid Ibex
First off, an Ibex is just a wild mountain goat native to Eurasia, North Africa, and East Africa. I had to look it up when 8.10 was first announced back in April.
What's Planned For Intrepid
GNOME 2.23.91 Desktop Environment
Nautilus file manager finally gets tab support and eject icons for removable drives in Places sidebar. File Roller archive manager now supports ALZ, RZIP, CAB, TAR.7Z file types.
X.Org server 7.4
Much better support for hot-pluggable input devices such as tablets, keyboards, and mice.
Linux kernel 2.6.27
Lots of big improvements, head over to www.kernel.org for details.
Encrypted private directory
Keep you private data from prying eyes.
Guest Session
Creates a temporary guest account with a temporary home directory and some restricted privileges. Guests are not able to read any home directory or do any permanent changes to the system.
Network Manager 0.7
Comes with long-expected features, such as, system wide settings, management of 3G connections (GSM/CDMA), management of multiple active devices at once, management of PPP and PPPOE connections, management of devices with static IP configurations, and route management for devices.
Last Successful Boot Recovery Entry
A copy of your running kernel is made after every successful boot and made available from the boot loader as a "Last successful boot" option. This makes it possible for old kernel packages to be safely auto-removed by the package manager, instead of being kept indefinitely.
DKMS
Allows kernel drivers to be automatically rebuilt when new kernels are released. Making it possible for kernel package updates to be made available immediately without waiting for rebuilds of driver packages, and without third-party driver packages becoming out of date when installing these kernel updates.
Lots of great stuff to look forward to. Hardy was a great release for 1501 users lets hope the good times keep rolling.
Labels:
8.10,
features,
Intrepid Ibex,
ubuntu
Saturday, August 16, 2008
redDEAD is Not Dead
I'm alive, still using Ubuntu Hardy Heron 8.04 and waiting for Intrepid Ibex 8.10 to come out. You can find Intrepid's release schedule here.
Expect the site to really go live again around September 4th for the Alpha 5 release and full coverage leading to the full release.
I don't know how many people are still running Ubuntu on their 1501, but I know at least I'm going to be.
Expect the site to really go live again around September 4th for the Alpha 5 release and full coverage leading to the full release.
I don't know how many people are still running Ubuntu on their 1501, but I know at least I'm going to be.
Labels:
8.10,
Intrepid Ibex
Saturday, June 28, 2008
Getting The Modem To Work In Hardy
If you upgraded your install from Gutsy Gibbon to Hardy Heron, your modem may not work. You need to install the new hsfmodem deb. If you have the older version of the Conexant Modem driver, please uninstall it before installing the new one.
You can find the driver here. This is only for the 32bit version of Ubuntu, the one I use and recommend. 64 bit users will need to go here. There is no deb for the 64bit driver so installation can be a bit of a chore.
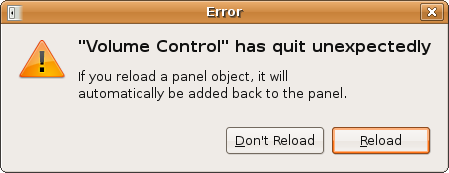
After installing the modem driver, you might get a pop-up window telling you that the Volume Control has quit unexpectedly and asks you to reload (or not reload) the panel. Click on Reload. Afterwards, the sound icon on the top right corner of the screen changes to "mute", but sound should be fine. A logout/login or GDM restart should have solved the issue. This issue happens because the modem driver lays down its own set of sound codecs and unloads the snd-hda-intel module during the installation process. But it doesn't, when I tried to modprobe snd-hda-intel I received an error. If you check the comments Mmandx has found a workaround. You can download an version of the alsa-driver package (from the ALSA project) with improved support for the HSF driver here.
edited by pHreaksYcle
Labels:
conexant modem,
guide,
hardy heron,
howto,
modem,
ubuntu
Tuesday, June 17, 2008
What is The Terminal & How Do I Find It
I realized that I talk about using the terminal a lot in this blog. Just about every guide asks users to fire up a terminal. I never have bothered to explain what it is or how to find it, and for that I'm sorry new Ubuntu/Linux users.
When I say terminal I really mean, a command line interpreter. The command line interpreter is a computer program that reads lines of text entered by a user and interprets them in the context of a given operating system or programming language.
The terminal gives you complete access to your operating system and often allows you to do things faster and more efficiently.
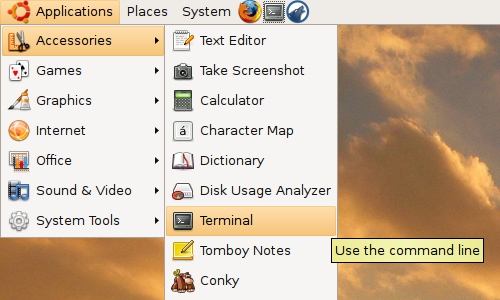
To access Ubuntu's terminal go to: Applications>Accessories>Terminal
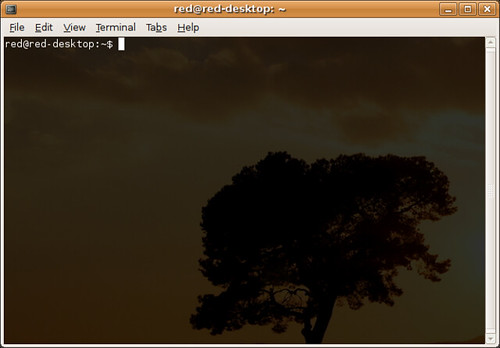
It looks like this:
I know this may seem silly to many long time readers and hardcore Linux users, but if it wasn't for my buddy Muki showing me the terminal, I would have been asking this question to, or maybe I would have just googled it.
edited by pHreaksYcle
Wednesday, June 4, 2008
Fix PulseAudio - Play Video & Audio While Playing Flash
There is a known issue with Firefox/Flash and PulseAudio.
PulseAudio is the standard sound server in Ubuntu Hardy Heron 8.04. A sound server is a background process that accepts sound input from one or more sources (like your applications) and redirecting it to one or more sinks (like your sound card). Unfortunately it doesn't quite work with Flash 9 support in Firefox.
There is an easy fix:
In a terminal type:
sudo apt-get install libflashsupport
Now when you have audio and video playing, Flash will have sound and vice-versa.
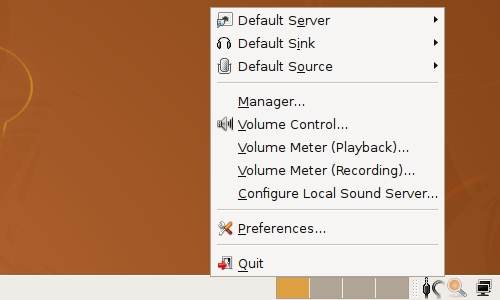
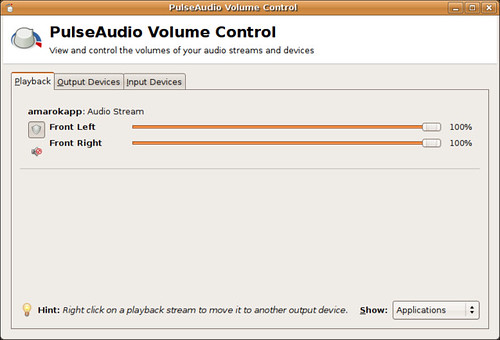
To get the most out of PulseAudio, you may want to download and install the device chooser.
In a terminal type:
sudo apt-get install padevchooser
sudo apt-get install pavucontrol
edited by pHreaksYcle
Labels:
audio,
convert video,
firefox,
flash,
hardy heron,
pulseaudio,
ubuntu
Tuesday, May 27, 2008
Make KDE Look Like Gnome
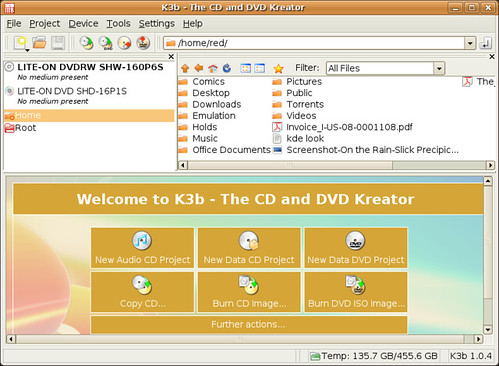
This guide will show you how to make KDE applications look just like and feel like Gnome applications. I can't live without my KDE applications, specifically Amarok, k3b or k9copy; but have always been annoyed by the clashing of styles on my desktop.
KDE Applications Before Using The Guide:
After using the Guide:
Configure KDE
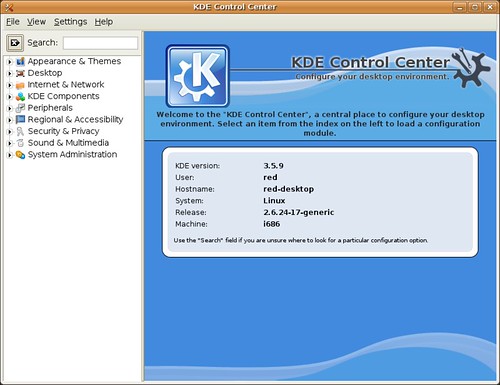
To make this guide work you first need to download the KDE Control Center, kControl. It is the centralized settings manager for the KDE desktop environment.
To Download kControl
sudo apt-get install kcontrol
To launch kControl, enter kcontrol into a run box (Alt+F2), or type it into a terminal.
Gnome Style
Klearlook is a widget style for KDE that is based off the QtCurve style. As its name suggests, it is intended to be a KDE replica of the GTK theme "Clearlooks". Navigate to Appearance & Theme>Style.
To Download Klearlook
sudo apt-get install kde-style-klearlook
Select Klearlooks from the drop down menu under Widget Style.
Gnome Icons
Human Icon Pack for Kde is the best replica of the Human theme for Kde I have seen. It cover all major and minor icons. Navigate to Appearance & Theme>Icons.
To Download Human_KDE.tar.gz, click this link.
Select Install New Theme and navigate to where you saved the Human_KDE.tar.gz file and install it.
Gnome Colors
To make the color scheme in KDE match Gnome, navigate to Appearances & Themes>Colors.
Enter these values to match Gnome color layout.
Inactive Title Bar #C1C5AB
Active Title Bar #D5A637
Standard Text #000000
Selected Text #F8C779
Standard Background #FFFFFF
Link #0000C0
Followed Link #800080
Gnome Feel (Mouse Options)
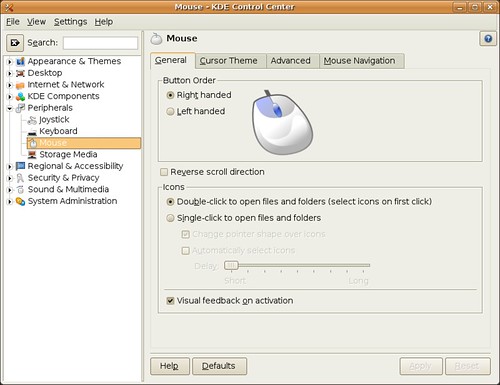
To make KDE applications feel more like Gnome applications, navigate to Peripherals>Mouse to change KDE's single click default to match Gnome's double click default.
edited by pHreaksYcle
Thursday, May 1, 2008
Linux on the Linksys WRT54GL
In a move to put Linux on everything I own, I just installed DD-WRT on my Linksys router. DD-WRT is free Linux-based firmware for several wireless routers, most notably the Linksys WRT54G family. Many of DD-WRT's features are not included in typical router firmware. These features include support for the Kai network, daemon-based services, IPv6, Wireless Distribution System, RADIUS, advanced quality of service, radio output power control, overclocking capability, and software support for a Secure Digital Card hardware modification.
The Linksys WRT54GL was released in 2005 to support third-party firmware based on Linux. Its fully compatible with DD-WRT. This guide also works for a couple of other LinksysWRT54G, models WRT54G v4 and earlier, but the WRT54GL is the the preferred router to buy/use.
If you want to see what other routers are DD-WRT compatible go here.
BEFORE YOU START:
Use an ethernet cable to connect your PC to your router (use port 1)
DO NOT attempt to use the guide via wifi, you will brick your router.
Step 1: Get Your Router Ready
Type the following into your browser's URL box:
http://192.168.1.1
Restore your router to its factory settings:
In the Administration tab, under Factory Defaults, select YES and the SAVE the Settings.
Log Back Into Your Router:
http://192.168.1.1
name= *Leave It Blank*
password= admin
Step 2: The Inital Flash
Download dd-wrt.v23_mini_generic.bin
Unzip the dd-wrt.v23_sp2_mini.zip file
Go to Firmware Management, under Administration>Firmware Management.
Select the dd-wrt.v23_mini_generic.bin file
Select UPGRADE to begin the process.
* Do not interrupt the process * make sure the router stays plugged in
You will see an Upgrade Successful screen message
Click CONTINUE.
Step 3: Reset and Flash Firmware Again
Find the reset button on the back of the WRT54GL
Hold down the reset button for 30 seconds
Release the reset button
Allow the lights to blink for 15 seconds
Log Back Into Your Router:
http://192.168.1.1
username= root
password= admin
Download the dd-wrt.v23_generic.bin
Unzip the dd-wrt.v23_sp2_standard.zip file
Go to Firmware Management, under Administration>Firmware Management.
Select the dd-wrt.v23_generic.bin file
Select UPGRADE to begin the process.
* Do not interrupt the process * make sure the router stays plugged in
Find the reset button on the back of the WRT54GL
Hold down the reset button for 30 seconds
Release the reset button
Allow the lights to blink for 15 seconds
Step 4: Login & Setup Your Router
http://192.168.1.1
username= root
password= admin
Labels:
DD-WRT,
linksys WRT54GL,
linux,
router,
wireless
Thursday, April 24, 2008
Reconfigure Xorg File (xserver-xorg)
If you need to reconfigure your xserver-xorg file, are having issues with your monitor resolution, need to reset xorg or just plain can't get a graphical interface to load, use this command.
In a terminal type:
dpkg-reconfigure xserver-xorg
This will allow you to reconfigure your xorg settings, resolution, graphical problems etc.
In a terminal type:
dpkg-reconfigure xserver-xorg
This will allow you to reconfigure your xorg settings, resolution, graphical problems etc.
edited by pHreaksYcle
Labels:
howto,
reconfigure,
x-server
Installing Wine In Hardy Heron
Wine is a software application which aims to allow Unix-like computer operating systems on the x86 architecture to execute programs that were originally written for Microsoft Windows.
There are two methods to installing Wine
1. Install Wine from Ubuntu's own repository, it is an older but officially supported version for Hardy Heron.
In a terminal type:
sudo apt-get install wine
2. Add Wine's own repository, this gives you the newest version of Wine and access to all future updates
In a terminal type:
wget -q http://wine.budgetdedicated.com/apt/387EE263.gpg -O- | sudo apt-key add -
Next, add the repository to your system's source list:
In a terminal type:
sudo wget http://wine.budgetdedicated.com/apt/sources.list.d/hardy.list -O /etc/apt/sources.list.d/winehq.list
Update Your Source List:
In a terminal type:
sudo apt-get update
Install Wine
In a terminal type:
sudo apt-get install wine
Once installed (either method) you can configure Wine by running:
winecfg
Make Wine Graphical User Interface Match Ubuntu's
Ina terminal type:
gedit ~/.wine/user.reg
Replace the [Control Panel\\Colors] section with
[Control Panel\\Colors] 1176981676
"ActiveBorder"="239 235 231"
"ActiveTitle"="203 133 61"
"AppWorkSpace"="198 198 191"
"Background"="93 77 52"
"ButtonAlternativeFace"="200 0 0"
"ButtonDkShadow"="85 85 82"
"ButtonFace"="239 235 231"
"ButtonHilight"="255 255 255"
"ButtonLight"="255 255 255"
"ButtonShadow"="198 198 191"
"ButtonText"="0 0 0"
"GradientActiveTitle"="239 235 231"
"GradientInactiveTitle"="239 235 231"
"GrayText"="198 198 191"
"Hilight"="246 200 129"
"HilightText"="0 0 0"
"InactiveBorder"="239 235 231"
"InactiveTitle"="239 235 231"
"InactiveTitleText"="255 255 255"
"InfoText"="0 0 0"
"InfoWindow"="255 255 166"
"Menu"="239 235 231"
"MenuBar"="239 235 231"
"MenuHilight"="246 200 129"
"MenuText"="0 0 0"
"Scrollbar"="239 235 231"
"TitleText"="255 255 255"
"Window"="255 255 255"
"WindowFrame"="0 0 0"
"WindowText"="0 0 0"
A Quick Screenshot:
edited by pHreaksYcle
Labels:
hardy heron,
make wine pretty,
ubuntu,
wine
Monday, April 14, 2008
Stop Compiz-Fusion From Loading Automatically
This guide will show you how to stop Compiz-Fusion from loading automatically on startup in Hardy Heron and how to setup a shortcut for launching Compiz when you want.
Step 1: Run gconf-edit
Start Run Application by pressing Alt+F2
Enter gconf-editor into the box, hit enter
Step 2: Set Metacity as your default start up window manager
Once in gconf-editor navigate to desktop>gnome>applications>window_manager
under current and default replace each instance of:
/usr/bin/compiz with /usr/bin/metacity
it should like this when you're done:
Step 3: Create a shortcut for starting Compiz-Fusion
right click the Applications Places System Menu
select the Edit Menu option
pick a location for your shortcut and select New Item box
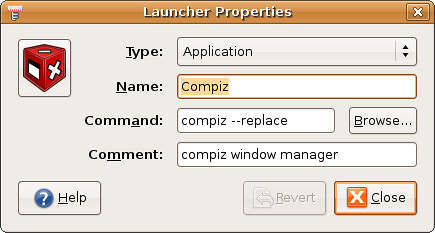
Type: Application
Name: Compiz
Command: compiz --replace
COmment compiz window manager
An Compiz icon pack for your shortcut. Includes some old, new and proposed icons for Compiz.
Labels:
compiz fusion,
hardy heron,
ubuntu
Sunday, April 13, 2008
Overview of Ubuntu 8.04 Hardy Heron on the Dell 1501
Everything you need to get Ubuntu 8.04 running on your Dell Inspiron 1501.
Installation
Hardy installs with no problems. Whether you're using the LiveCD, Alternative Install or Wubi.
Wireless
Two Methods:
1. The Restricted Driver Manager can install the Broadcom B43 fireware.
Firmware cutter will not work when used through the Driver Manager. In order to install B43-fwcutter you need to use the terminal.
In a terminal Type:
sudo apt-get install b43-fwcutter
2. Use NDISwrapper to install the driver. This guide will walk you through the setup.
ATI Proprietary Driver
Two Methods:
1. The Restricted Driver Manager can install the the driver for ATI graphics card in the Dell 1501. ATI's 2.1.7281 fglrx driver is automatically installed, configured and 3D enabled. The best part is that the new Ubuntu repository fglrx driver supports AIGLX, no more XGL.
2. You can install the newest ATI driver that uses AIGLX yourself. You can find that guide here (use method two) or use Envy to install the newest ATI driver for you.
Compiz-Fusion
Compiz-Fusion is enabled once you install the ATI Propiety Driver.
To get the most out of Compiz try installing the advanced configuration tool.
In a terminal:
sudo apt-get install compizconfig-settings-manager
Media Codecs
Hardy Heron makes codec installation easy mp3, DVD, avi, aac, mpeg, wmv, asf, mov, flv, mp4, flash codecs are installed when you try to play them. If you like to add all the major codecs and make playback easy, check out my codec cheatsheet. The only thing not enabled in Ubuntu is reading encrypted DVDs. To add DVD playback and some other helpful media codecs to Ubuntu follow this guide.
Ethernet
Works out of the box. In order to do any of these guides you're going to need to plug in your Dell Inspiron 1501. Don't be cheap, go out and buy an Ethernet cable.
Brightness & Volume
Brightness (Fn Up/Down Arrow) and Volume (Fn Page Up/Page Dn) keyboard shortcuts both work with BIOS 1.70. Please leave a comment letting others know if your BIOS work.
Suspend & Hibernate
Both Suspend and Hibernate work with BIOS 1.70 and the Ubuntu repository ATI 2.1.7281 fglrx driver. Please leave a comment letting others know if your BIOS and/or ATI driver combination work. You can find a mini guide about BIOS flashing here.
Video Out
Works out of the box, Hardy's Screens and Resolutions (System>Administration>Screens and Resolutions) makes using multiple monitors a breeze. Configuration doesn't require editing your xorg.conf file.
Modem
The Conexant Modem driver is usually released by Dell once they switch their Linux machines over to the new version of Ubuntu. I'll update the site and this space when Dell releases the new driver.
Card Reader
Works out of the box.
Overall:
Hardy Heron is the Ubuntu release that Dell Inspiron 1501 owners have been waiting for. Everything works, you only need to install 3 drivers (ATI, wireless and modem). If you were hesitant about trying Ubuntu on your 1501, rest assured, it takes minimal skill and computer knowledge to setup.
Labels:
ATI driver,
brightness,
card reader,
compiz fusion,
conexant modem,
ethernet,
hardy heron,
hibernate,
install,
media codecs,
suspend,
ubuntu,
volume,
wireless
Friday, April 11, 2008
NDISwrapper In Hardy Heron
When the Dell 1501 first came out there were no native wireless drivers for the internal Broadcom chipset, so NDiswrapper was the only way to get wireless working. NDiswrapper uses a wireless devices' Windows driver in Linux. It works surprisingly well. Using NDiswrapper allows you to run the Broadcom card in your Dell 1501 at full speed and connect to certain networks that the native Broadcom driver can't. In Hardy Heron there was a slight problem with NDiswrapper. I found the fix to get ssb from loading before NDiswrapper from this forum post. Thanks to Ubuntu Forum user Mazza558, NDiswrapper is working again on the Dell 1501.
If you are using the native Broadcom driver via the Driver Manager and it's working for all your day to day needs, I wouldn't recommend taking the time to change drivers.
If you have already enabled the Broadcom restricted driver, uninstall it before attempting this guide.
Step 1: Stop ssb From Loading Before NDISwrapper
Make a script for NDISwrapper's fix
In a terminal type:
sudo gedit /etc/init.d/wirelessfix.sh
Paste this into the file:
#!/bin/bash
modprobe -r b44
modprobe -r b43
modprobe -r ssb
modprobe -r ndiswrapper
modprobe ndiswrapper
modprobe b44
Point the terminal to your init.d file and make your script exectuable:
In a terminal type:
cd /etc/init.d/ && sudo chmod 755 wirelessfix.sh
Update and make it stick:
In a terminal type:
sudo update-rc.d wirelessfix.sh defaults
Then reboot
In a terminal type:
sudo reboot
Step 2: Get Needed Packages
To install ndiswrapper
In a terminal type:
sudo apt-get install ndiswrapper-utils-1.9 ndiswrapper-common
or you can also try:
sudo apt-get install ndiswrapper-utils-1.9* ndiswrapper-common
***If the terminal outputs an error message, telling you NDISwrapper could not be found, insert the Ubuntu disc you used to install Hardy Heron and manually search for the file.
Get the Windows driver for your Dell 1501
In a terminal type:
wget http://ftp.us.dell.com/network/R140747.EXE
Step 3: Get Everything Ready
Now we will make a folder.
In a terminal type:
mkdir ~/.drivers
Now we will move R140747.EXE (the Dell driver), to the folder we just made.
In a terminal type:
mv ~/R140747.EXE ~/.drivers
STEP 4: Driver Setup
In order for us to unzip the R140747.EXE driver we need to point your terminal to the /.driver folder.
In a terminal type:
cd ~/.drivers
Unzip the R140747.EXE driver
In a terminal type:
unzip -a R140747.EXE
We need to point your terminal to the DRIVER folder we just unzipped
In a terminal type:
cd ~/.drivers/DRIVER
Step 5: Configure The Windows driver With NDISwrapper
Now install the Windows driver
In a terminal type:
sudo ndiswrapper -i bcmwl5.inf
Then:
sudo ndiswrapper -l (that is a lowercase L)
You should see a message that says driver present, hardware detected.
Now finish installing the driver
In a terminal type:
sudo ndiswrapper -m
Then:
sudo modprobe ndiswrapper
YOU MUST REBOOT NOW!
In a terminal type:
sudo reboot
STEP 6: TEST WIRELESS
Your wifi light on your laptop should be illuminated. If not, you can always turn it on and off with the Fn+F2 (Function & F2 Key) and you're all set! Try running this to see if your wireless card is functioning properly.
In a terminal type:
sudo iwlist scanning
edited by pHreaksYcle
Labels:
fix,
guide,
hardy heron,
howto,
ndiswrapper,
ubuntu,
wireless
Wednesday, April 9, 2008
Firefox 3 Beta 5 Ramblings
I complained about Firefox 3 Beta 4 being included in the Alpha 5 release of Hardy Heron. The complaint was valid, at the time most plugins were not Firefox 3 compatible, spell check wasn't working and not having a fully working bowser was painful. Firefox is the most used program on my computer. Having a dwarfed version that makes it harder for me to surf the web was my only real complaint about Hardy Heron.
There are some good things about Firefox 3 Beta that leave me hopeful:
One of the big changes in Firefox 3 is the implementation of Gecko 1.9 and xulrunner. Firefox 3 fixes many bugs, improves standard compliance, and implements new web APIs. Firefox 3 is the first official release of a Mozilla browser to pass the Acid2 test. It also gets a better score on the Acid3 test than Firefox 2. Standards compliance is important.
A new internal memory allocator, jemalloc, is used rather than the default libc one. Firefox 2 had problems keeping memory usage stable. So far I haven't had any problems with Firefox 3, it's footprint has been minimal.
Gecko 1.9 uses Cairo as a graphics back end, allowing for improved graphics performance and better consistency of look and feel on various operating systems. I included a picture of my Firefox 3 setup below.
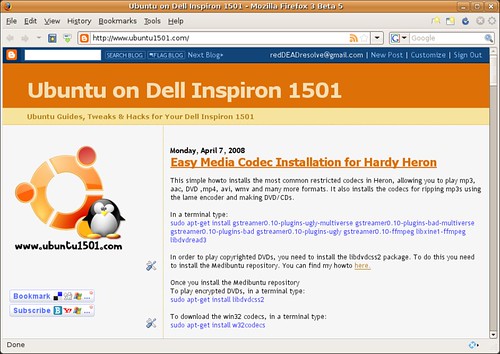
It fits perfectly with the look and feel of Ubuntu's human theme. I hated how Firefox 2 looks, I preferred 1.5's look; but after using Firefox 3 I think I'm ready to make the switch to the gtk theme.
Plugins are being updated to be compatible with Firefox 3 Beta 5 (and Firefox 3 in general). So most our of favorite plugins will be Firefox 3 ready within the next month.
Some cool tweaks for Firefox 3:
Access FireFox's Configuration File
Type about:config into the URL address bar
The red box is the url, where you type about:config
The Blue box is the filter box, it allows you to search through the about:config file and is where you type the green text commands.
Make Firefox to run faster:
Normally the browser will make one request to a web page at a time. When you enable pipelining it will make several at once, which really speeds up page loading.
Set "network.http.pipelining" to "true"
Set "network.http.proxy.pipelining" to "true"
Set "network.http.pipelining.maxrequests" to 15.
Right-click anywhereinside the firefox winodw and select New-> Integer.
Name it "nglayout.initialpaint.delay" and set its value to "0″.
Firefox downloads webpages from links it thinks you may click. This may make the "experience" seem faster but really it just bogs down Firefox and you PC.
Set "network.prefetch-next" to false
Turn off chrome tool tips, this causes little pop up windows to tell you what your mouse is hovering over. If you been using Firefox for as long or longer than I have (before 1.0) you really don't need to be told what the back button does. It also hinders dragging a bookmark into the bookmark toolbar folder, the tool tip gets in the way and prevents the drop from working.
Set "browser.chrome.toolbar_tip" to false
Customize backspace button, the Ubuntu default is set to scroll up when hit. I prefer it to work like it did in Windows and go back in my page history.
Set "browser.backspace_action" to either 0 or 1
0 - Pressing backspace button will go back a page in the session history
1 - Pressing backspace button will scroll up a page in the current document and
[Shift]+[Backspace] will scroll down.
To enable auto scrolling & smooth scrolling go to Edit->Preferences and click Advanced. It allows you to middle click/touch pad scroll smoothly left, right, up and down web pages. It's enabled in Windows but not in Ubuntu
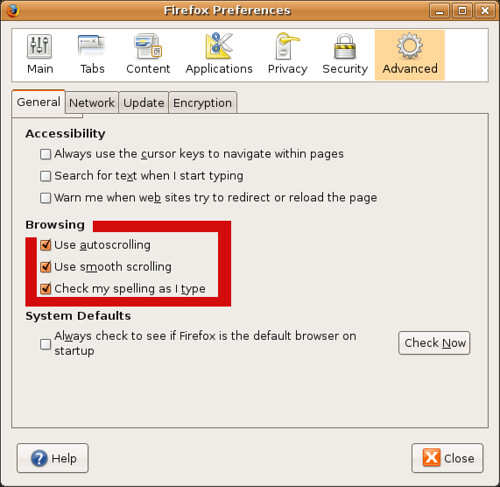
Some Helpful Firefox Plugins that have been upgrade to work with Firefox 3 Beta 5:
Foxmarks Bookmarks
If you use Firefox on more than one computer, you'll want Foxmarks. Install Foxmarks on each computer, and it will work silently in the background to keep your bookmarks synchronized. As a bonus, log in to my.foxmarks.com from any computer anywhere to access your bookmarks. The Firefox 3 version of Foxmarks Bookmarks is currently in beta and is only available if you sign up. Good news is that they're signing people up left and right.
Flashblock
Flashblock is an extension for the Mozilla, Firefox, and Netscape browsers that takes a pessimistic approach to dealing with Macromedia Flash content on a webpage and blocks ALL Flash content from loading. It then leaves placeholders on the webpage that allow you to click to download and then view the Flash content.
Adblock Plus
Right-click on a banner and choose "Adblock" from the context menu - the banner won't be downloaded again. Maybe even replace parts of the banner address with star symbols to block similar banners as well. Or you select a filter subscription when Adblock Plus starts up the first time, then even this simple task will usually be unnecessary: the filter subscription blocks most advertisements automatically.
edited by pHreaksYcle
Monday, April 7, 2008
Easy Media Codec Installation for Hardy Heron
This simple howto installs the most common restricted codecs in Heron, allowing you to play mp3, aac, DVD ,mp4, avi, wmv and many more formats. It also installs the codecs for ripping mp3s using the lame encoder and making DVD/CDs.
In a terminal type:
sudo apt-get install gstreamer0.10-plugins-ugly-multiverse gstreamer0.10-plugins-bad-multiverse gstreamer0.10-plugins-bad gstreamer0.10-plugins-ugly gstreamer0.10-ffmpeg libxine1-ffmpeg libdvdread3
In order to play copyrighted DVDs, you need to install the libdvdcss2 package. To do this you need to install the Medibuntu repository. You can find my howto here.
Once you install the Medibuntu repository
To play encrypted DVDs, in a terminal type:
sudo apt-get install libdvdcss2
To download the win32 codecs, in a terminal type:
sudo apt-get install w32codecs
To download the FFmpeg Encoders, in a terminal type:
sudo apt-get install ffmpeg
Labels:
dvd,
ffmpeg,
hardy heron,
media codecs,
ubuntu,
w32codecs
Medibuntu for Hardy Heron
Medibuntu (Multimedia, Entertainment & Distractions In Ubuntu) is a repository of packages that cannot be included into the Ubuntu distribution for legal reasons like copyright, license or patent restrictions. It also includes many popular media .debs for ffmpeg, w32codes, skype and google earth.
Ubuntu 8.04 Hardy Heron can't play encrypted DVDs out of the box. In order to play DVDs you need to install a couple of codecs. This guide will show you how to install the Medibuntu repository and codecs.
This will add the Medibuntu repository to your repository lists
In a terminal type:
sudo gedit /etc/apt/sources.list
Add this to the end of your source list:
## Medibuntu - Ubuntu 8.04 "hardy"
## Please report any bug on https://bugs.launchpad.net/medibuntu/
deb http://packages.medibuntu.org/ hardy free non-free
Then you have to add the GPG Key to authenticate the packages
In a terminal type:
wget -q http://packages.medibuntu.org/medibuntu-key.gpg -O- | sudo apt-key add - && sudo apt-get update
Now update your system to load the Medibuntu repository into your apt-get sources
In a terminal type:
sudo apt-get update
Download the DVDs playback packages
In a terminal type:
sudo apt-get install libdvdcss2 libdvdread3
edited by pHreaksYcle
Labels:
hardy heron,
media codecs,
Medibuntu,
ubuntu
Friday, April 4, 2008
Why NDISwrapper Didn't Work in Heron
The article doesn't apply anymore, NDISwrapper does work in Hardy Heron, you can find the fix here.
NDISwrapper is a free software driver wrapper that enables the use of Microsoft Windows drivers for wireless network devices (cards, USB modems, and routers), on Unix-like operating systems. Ndiswrapper works by implementing the Windows kernel and NDIS APIs, and dynamically linking the driver to this implementation.
With the release of Hardy Heron, I tried getting NDISwrapper working, as it was my prefered method of wireless on my Dell 1501. I tried a bunch of different methods but nothing worked for me. I was reading linux.slashdot.org today when I came across this article.
It explains why I was unable to get ndiswrapper to work in Hardy Heron. A change in the 2.6.24 kernel broke ndiswrapper by accidentally removing its access to GPL-only symbols. Without access to GPL-only symbols NDISwrapper is unable to implement the Windows kernel and NDIS APIs and link the driver.
Pavel Roskin attempted to patch the kernel to allow NDISwrapper to access those GPL-only symbols but Linus Torvalds shot down his patch. He stated, "I'm not seeing why ndiswrapper should be treated separately. If it loads non-GPL modules, it shouldn't be able to use GPLONLY symbols." He then went on to state, "ndiswrapper itself is *not* compatible with the GPL. Trying to claim that ndiswrapper somehow itself is GPL'd even though it then loads modules that aren't is stupid and pointless. Clearly it just re-exports those GPL ONLY functions to code that is *not* GPL'd."
Linus makes a excellent point, if NDISwrapper is going to abuse the use of GPL-only sysmbols by exporting them to code that is not GPL then they should not have access to GPL code. While it saddens me that the faster method of using the Broadcom card in my Dell Inspiron 1501 is gone, I do believe in the GPL.
Until then there's always:
sudo apt-get install b43-fwcutter
edited by pHreaksYcle
Labels:
hardy heron,
ndiswrapper,
ubuntu,
wireless
Friday, March 28, 2008
Ubuntu Hardy Heron: Beta - Review and Wireless fix
Even more promising than the Alpha versions, as expected. Everything is a lot more stable, Firefox 3 is warming up to us and it is overall a good experience.
Installation
Although most peoples 1501's will work with no hiccups in the beta, we did experience an issue with our install. When trying to format the disk and install fresh, it would not format. There was a known bug that locked any previous partitions. To wipe the drive and start with the whole thing unallocated, it was necessary to create a new disk label by going to System->Administration->Partition Editor and in Partition Editor selecting Device->Set Disklabel. This is easy but should not be necessary. Hopefully by the official release this will not be needed for anyone and it will work the way it is supposed to.
Wireless
The Driver Manager still has a bug when installing the driver. The Broadcom B43 firmware cutter will not work when used through the Driver Manager. In order to install B43-fwcutter you need to use the terminal.
In a terminal Type:
sudo apt-get install b43-fwcutter
This takes care of the driver, and we can see wireless networks. If you're lucky, you can connect to them too, but many of our readers have been reporting that connecting just keeps going and going with the connecting animation seemingly going on forever with no results at all.
For the majority of users, the most recent updates that include the new version of "network-manager" will fix this issue. For those of you who are still encountering issues after updating completely, congratulations you have found the fix.
This will uninstall the unworking version of network-manager, that screws up and replace it with the old one which works without flaw.
Download the working version - Type in a terminal
sudo wget http://download38.mediafire.com/2bdi9e0d0l7g/jyjze9dd7t9/network-manager_0.6.6-0ubuntu1_i386.deb
Downgrade - Type in a terminal
sudo dpkg -i network-manager_0.6.6-0ubuntu1_i386.deb
If you followed the instructions, you now have wireless working perfectly. Simple, two commands, copy and paste, you don't even need to reboot. Hope this is satisfactory to everyone in need.
All other categories (ATI driver, card reader, modem etc.) have remained the same since Alpha 6.
Please tell me how these things work for you in the comments, a few of the testers have already confirmed it works well but I want to hear from everyone else. Keep up to date, good things to come soon.
pHreaksYcle
Tuesday, March 25, 2008
WIRELESS FIX TESTER NEEDED
UPDATE: The fix has been released. Thanks to those who tested!
UPDATE: The new update with the ubuntu3 package has been released, not sure how long ago. It fixes all the problems, rendering my fix pretty much useless before I even published it. Sorry, but at least it works.
UPDATE: Testers have been notified with instructions, if you would still like to participate, hit me up. Hopefully we will be getting success stories soon.
There has been complaints that wireless has stopped working recently and not connecting to networks but still being able to see them. This is due to an updated version of network-manager with regressions. If you would like to test a fix to help us make the post, please contact pHreak immediately at pHreaksYcle for AIM or the same at gmail.com for more info!
Thanks,
pHreaksYcle
Sunday, March 23, 2008
Ubuntu Hardy Heron 8.04 New User Guide
Overview and setup for getting Ubuntu 8.04 Hardy Heron installed on the Dell Inspiron 1501
Setting Up Wireless with NDISwarapper
Easy Codec Installation
Encrypted DVD playback & Medibuntu
Stop Compiz-Fusion From Loading Automatically
Setting Up Wireless with NDISwarapper
Easy Codec Installation
Encrypted DVD playback & Medibuntu
Stop Compiz-Fusion From Loading Automatically
Labels:
ATI driver,
codecs,
conexant modem,
hardy heron,
new url,
ubuntu,
wifi,
wireless
Tuesday, March 11, 2008
Ubuntu Hardy Heron Alpha 6 Review
In a couple words, really promising. Everything is working well.
Installation
Heron installs with no problems. The GRUB resolution bug that plagued Gutsy is gone. Easy as following a simple graphical user interface.
Wireless
The Driver Manager has a bug when installing the driver. The Broadcom B43 firmware cutter will not work when used through the Driver Manager. In order to install B43-fwcutter you need to use the terminal.
In a terminal Type:
sudo apt-get install b43-fwcutter
Once you do this the WiFi light will light up then turn off. Wireless will work even with the light turned off. After a reboot the light does turn on.
I couldn't get ndiswrapper working. If you did, please let me know how you did it.
ATI Proprietary Driver
The Restricted Driver Manager can install the the driver for ATI graphics card in the Dell 1501. ATI's 2.1.7281 fglrx driver is automatically installed, configured and 3D enabled. The best part is that the driver supports AIGLX, no more XGL.
Compiz-Fusion
Compiz-Fusion is enabled once you install the ATI Propiety Driver.
To get the most out of Compiz try installing the advanced configuration tool.
In a terminal:
sudo apt-get install compizconfig-settings-manager
Media Codecs
Ubuntu will install the appropriate codec when you try to play a file. mp3, DVD, avi, aac, mpeg, wmv, asf, mov, flv, mp4, flash codecs are installed when you try to play them. If you like to add all the major codecs and make playback easy, check out my codec cheatsheet. The only thing codec Ubuntu will not enable is reading encrypted DVDs (You'll need to install it yourself).
Ethernet
Works out of the box. In order to do any of these guides you're going to need to plug in your Dell Inspiron 1501. Don't be cheap, go out and buy an Ethernet cable.
Brightness & Volume
Works with BIOS 1.70, use this guide for rolling back you BIOS.
LET ME KNOW IF THEY WORK WITH YOUR BIOS.
Logout, Suspend & Hibernate
Logout is working, suspend and hiberate are not working with BIOS 1.70.
LET ME KNOW IF THEY WORK WITH YOUR BIOS.
Sound
A kernel update broke sound, thats been fixed and sound on the 1501 works.
Modem
Will work once Dell releases the new driver, usually it takes a month after release.
Card Reader
Works out of the box.
Video
The 2.1.7281 fglrx ATI driver plays video while Compiz-Fusion running. This has been a problem with some ATI driver installs.
What I don't like
Firefox 3. Not that Firefox 3 is a blotted piece of bad software. It's that Firefox 3 is not compatible with 90% of my old plugins and 100% of my old themes. While this won't be an issue 3 or 4 months from now because plugin authors will update their plugins as Firefox 3 becomes used more, it is an issue now.
If there is anything else you want to know, please ask.
edited by pHreaksYcle
Labels:
hardy heron,
review,
ubuntu
Sunday, March 9, 2008
Heron Alpha 6
its looking good, but i cant get the wifi to work. any help?
Labels:
hardy heron,
ubuntu,
wifi
Saturday, March 1, 2008
Amazon MP3 Downloader Released For Linux
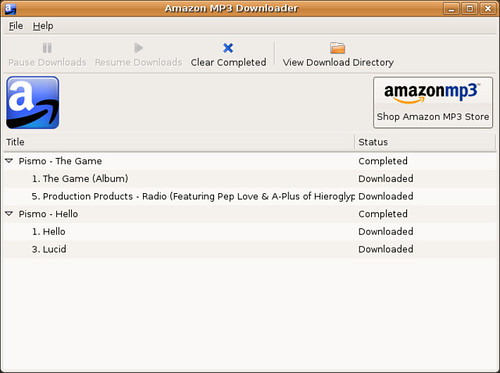
Amazon has just released a Linux version of their popular MP3 Downloader.
Amazon MP3 is a digital music store owned and operated by Amazon.com. It sells music without digital rights management (DRM) from the four major music labels (EMI, Universal, Warner Music, and Sony BMG), as well as many independents. All tracks are sold in 256 kilobits-per-second variable bitrate MP3 format without per-customer watermarking or DRM. Most songs are $0.99 and most albums are $9.99 or less.
Linux users have always been able to use the Amazon MP3 store but they have been limited to only being able to download one song at a time and having to pay $0.99 for each song on an album. With the Amazon MP3 Downloader, you get discounts on buying whole albums.
You can downloaded it HERE
Once installed you can change the preferences by going to File>Preferences.
I've been using this service for a while now, I love it. I can find a lot of independent music on it and it doesn't force any DRM or watermarking on me. If I want to share a song or album I can and don't have to worry about it being traced back to me. Before this I had to load up my Windows Virtual Machine, download an album and then copy it back into Linux so I could play it in Amarok and transfer it to my iPod.
edited by pHreaksYcle
Labels:
amazon,
linux,
mp3 downloader,
music,
ubuntu
Wednesday, February 13, 2008
Recommended Watching: Revolution OS
Revolution OS is a 2001 documentary film made in the United States, directed by J. T. S. Moore, which traces the twenty-year history of GNU, Linux, open source, and the free software movement.
It features interviews with prominent hackers and entrepreneurs (and hackers-cum-entrepreneurs), including Richard Stallman, Michael Tiemann, Linus Torvalds, Larry Augustin, Eric S. Raymond, Bruce Perens, Frank Hecker and Brian Behlendorf.
It is a great documentary, I want to to call it required watching. It is a must see if you want to learn about to the genesis of GNU, Linux and the people involved.
Check out the trailer here:
If it has caught your interest you can watch the full movie on Google videos here.
I'd love to know what you guys and girls think of it. I love the ideas behind GNU.
edited by pHreaksYcle
Labels:
documentary,
gnu,
linux,
revolution os
Thursday, February 7, 2008
Hardy Heron Alpha 4 on the Dell 1501
I usually do not install alpha software. It's too buggy and unpredictable. The reason why I use Ubuntu is because it just works for me. So when I decided to try alpha 4 of Ubuntu Hardy Heron 8.04, it was with much hesitation. Unfortunately Heron didn't do much to change my perception of alpha software.
The Good
1. Heron LiveCD works and boots without a problem on the 1501.
2. Installation works without a problem and the GRUB resolution bug (Ubuntu 7.10 taking forever to load) didn't effect me.
3. Migration of my old accounts worked without a problem.
4. Restricted Driver Manager named has been changed to Driver Manager. I like this, calling it restricted may give new users the wrong idea.
5. Tracker notified me when it was indexing and when it was done, I liked this.
The Bad
1. After installation I received this error message:
2. Driver Manager recognized my ATI graphics card but not my Broadcom wireless card.
3. Wireless doesn't work out of the box right now. (It should be working for the beta)
4. After installing ATI driver out of Ubuntu's repositories, my computer wasn't able to boot and my Heron partition became unusable.
The Ugly
Now I know Hardy Heron Alpha 4 is not intended for production machines/everyday use but it is really rough around the edges on the Dell 1501. New and advanced user alike may not want to spend the time fixing all the problems that arise in the alpha. I know I don't. This is the second time that installation of the Ubuntu ATI driver has killed my machine while running an alpha version of Heron. With all the bugs shipped in Gutsy I really hope the developers are taking the time to make Ubuntu 8.04 just work.
edited by pHreaksYcle
Labels:
alpha,
dell 1501,
hardy heron,
ubuntu
Wednesday, January 30, 2008
Happy One Year Anniversary To Me
This month marks the one year anniversary of Ubuntu1501.com
As usually I'd like to thank you guys for reading and coming back. I'm glad that I've helped so many people discover Ubuntu, Linux and open source software. I seem to never have enough time but the blog is a definite labor of love for me.
I do want to touch on a couple of subjects:
1. This coming month I will finish the iPod in Ubuntu guides. They have said coming soon for 5 months and it's about time.
2. I don't like Gutsy, and find it difficult to write about a release I dislike so much. Hopefully Heron will not have the same usability bugs Gutsy did. Four months later and I still am unable to encode CDs in VO. In Fesity, Edgy & Dapper it worked.
3. Dell doesn't sell the Inspiron 1501 anymore, so the site might not be as busy as it once was. I plan on updating with every release. It's a shame, I'd love to pick up a 1521 and continue the site but I think this is my last non-made for Linux laptop.
4. Some readers have complained that some of my guides aren't specific to the Dell Inspiron 1501, a lot of people find these guides useful. I'm not going to stop writing them anytime soon.
Enjoy the articles.
edited by pHreaksYcle
Labels:
Anniversary,
dell 1501,
ubuntu
Tuesday, January 22, 2008
Quick & Dirty Samba Guide
This is my very inelegant Samaba guide. For over a year I've been struggling to get Samba working properly. This is the best configuration I have found so far. I don't need to share a printer, I just need to get my laptop and desktop to share a couple of folders. This guide does just that, it allows you simple access to folders on different computers. If you guys have any suggestions or a better understanding of Samba please share them.
Step 1: Setup
Install Samba
sudo apt-get install samba
Stop Samba services
sudo /etc/init.d/samba stop
Backup your old samba.config
sudo mv /etc/samba/smb.conf /etc/samba/smb.conf.template
Create a blank samba.conf file
sudo touch /etc/samba/smb.conf
Start samba services
sudo /etc/init.d/samba start
Add a user
sudo smbpasswd -L -a (username you want to add)
Enable user
sudo smbpasswd -L -e (username you want to add)
Step 2: Create a name for your network:
Go to System>Administration>Shared Folders
You should see this, In the General Properties Tab:
Enter a Network Name, if networking with a Windows or Mac make sure you have the same network name entered for all your computers.
Step 3: Share a folder
To share a folder right click the folder you want to share, select the share folder option.
A box will pop up asking you how you want to share the folder and, if you want to make it read only. (These are my default settings)
To browse a network, go to Places>Networks
edited by pHreaksYcle
Monday, January 7, 2008
Ubuntu1501 in your language
In response to many comments from users who have mentioned being from countries other than the U.S., we have implemented Google Translate on the site to make it easier for those who have a different native language. You can find this feature on the left side of the site, near the top under the Ubuntu1501 logo. It should be noted that the colored text, (red, green and blue) is also translated, so please refer to the original articles for correct commands.
Hope this is useful!
pHreaksYcle
Hope this is useful!
pHreaksYcle
edited by redDEADresolve
Labels:
guides,
howto,
translate,
ubuntu1501
Saturday, January 5, 2008
Power Saving In Linux
Craig Russell sent me a very cool link about going green in Linux.
Less Watts is a great site about how to save power in Linux. These howtos and tips not only save energy and cut down on useless consumption, but give you better battery life.
It's well worth checking out if you go mobile often.
Less Watts is a great site about how to save power in Linux. These howtos and tips not only save energy and cut down on useless consumption, but give you better battery life.
It's well worth checking out if you go mobile often.
edited by pHreaksYcle
Labels:
guide,
howto,
linux kernel,
power saving,
ubuntu
Wednesday, January 2, 2008
Flash Plugin Not Installing
I just spent the last few hours struggling, trying to install the Flash plug-in in Ubuntu 7.10 Gutsy Gibbon, only to find out the package is broken. The Launchpad bug has already been filed.
The md5 checksum error doesn't allow the installation to complete.
You can find a better explanation and the .deb file with the correctmd5 checksum on this ubuntuforums.org thread.
The md5 checksum error doesn't allow the installation to complete.
You can find a better explanation and the .deb file with the correctmd5 checksum on this ubuntuforums.org thread.
Labels:
flash,
gutsy gibbon,
plugin,
ubuntu
Subscribe to:
Posts (Atom)